IREX - Installing Debian 13 on VirtualBox, a Complete Technical Walkthrough
Debian has long been one of the most reliable and stable Linux distributions, powering everything from personal computers to mission-critical servers. Its latest stable release, Debian 13 “Trixie”.
1. Introduction to Debian 13
2. System Requirements
3. Downloading the Debian 13 ISO Image
4. Setting Up a Virtual Machine
5. Step-by-Step Installation Process
6. Post-Installation Process
7. Cloning a Debian 12 Virtual Machine
8. Best Practices for Running Debian 13 on a VM
9. Conclusion
10. See More
1. Introduction to Debian 13
Debian is one of the most trusted and widely used Linux distributions, admired for its stability, large software
repository, and strict quality standards. Each new version is named after a character from Pixar’s Toy Story, and the latest release, Debian 13 “Trixie”, continues that tradition.
Released in August 2025, Debian 13 replaces Debian 12 “Bookworm” as the new stable release. It ships with a modern Linux kernel, updated desktop environments such as GNOME 48 and KDE Plasma 6, refreshed developer toolchains, and improved hardware support. With a five-year support cycle, Debian 13 is a solid choice for both servers and desktop systems.
2. System Requirements
Before installing Debian 13 in a virtual machine, it is important to ensure that your system meets the minimum and recommended requirements. This ensures smooth performance during installation and while running applications.
a. Minimum Requirements
- Oracle VirtualBox: latest version
- CPU: 1 GHz processor (single core)
- RAM: 1 GB (for a lightweight setup, e.g., command-line or XFCE)
- Storage: 10 GB of available disk space
- Display: VGA capable of 1024x768 resolution
- Boot Media: Debian 13 ISO image
b. Recommended Requirements(for desktop use)
- CPU: 2 GHz dual-core or better
- RAM: 2–4 GB (GNOME or KDE desktop requires more memory)
- Storage: 20 GB or more for applications and updates
- Networking: Internet connection for updates and additional package
c. Virtual Machine Considerations
When running Debian 13 inside VirtualBox, VMware, or another hypervisor:
- Assign at least 2 CPU cores for smoother performance.
- Allocate 2–4 GB RAM depending on desktop environment choice.
- Enable 3D acceleration if you plan to use modern graphical interfaces.
- Use a dynamically allocated virtual disk (at least 20 GB).
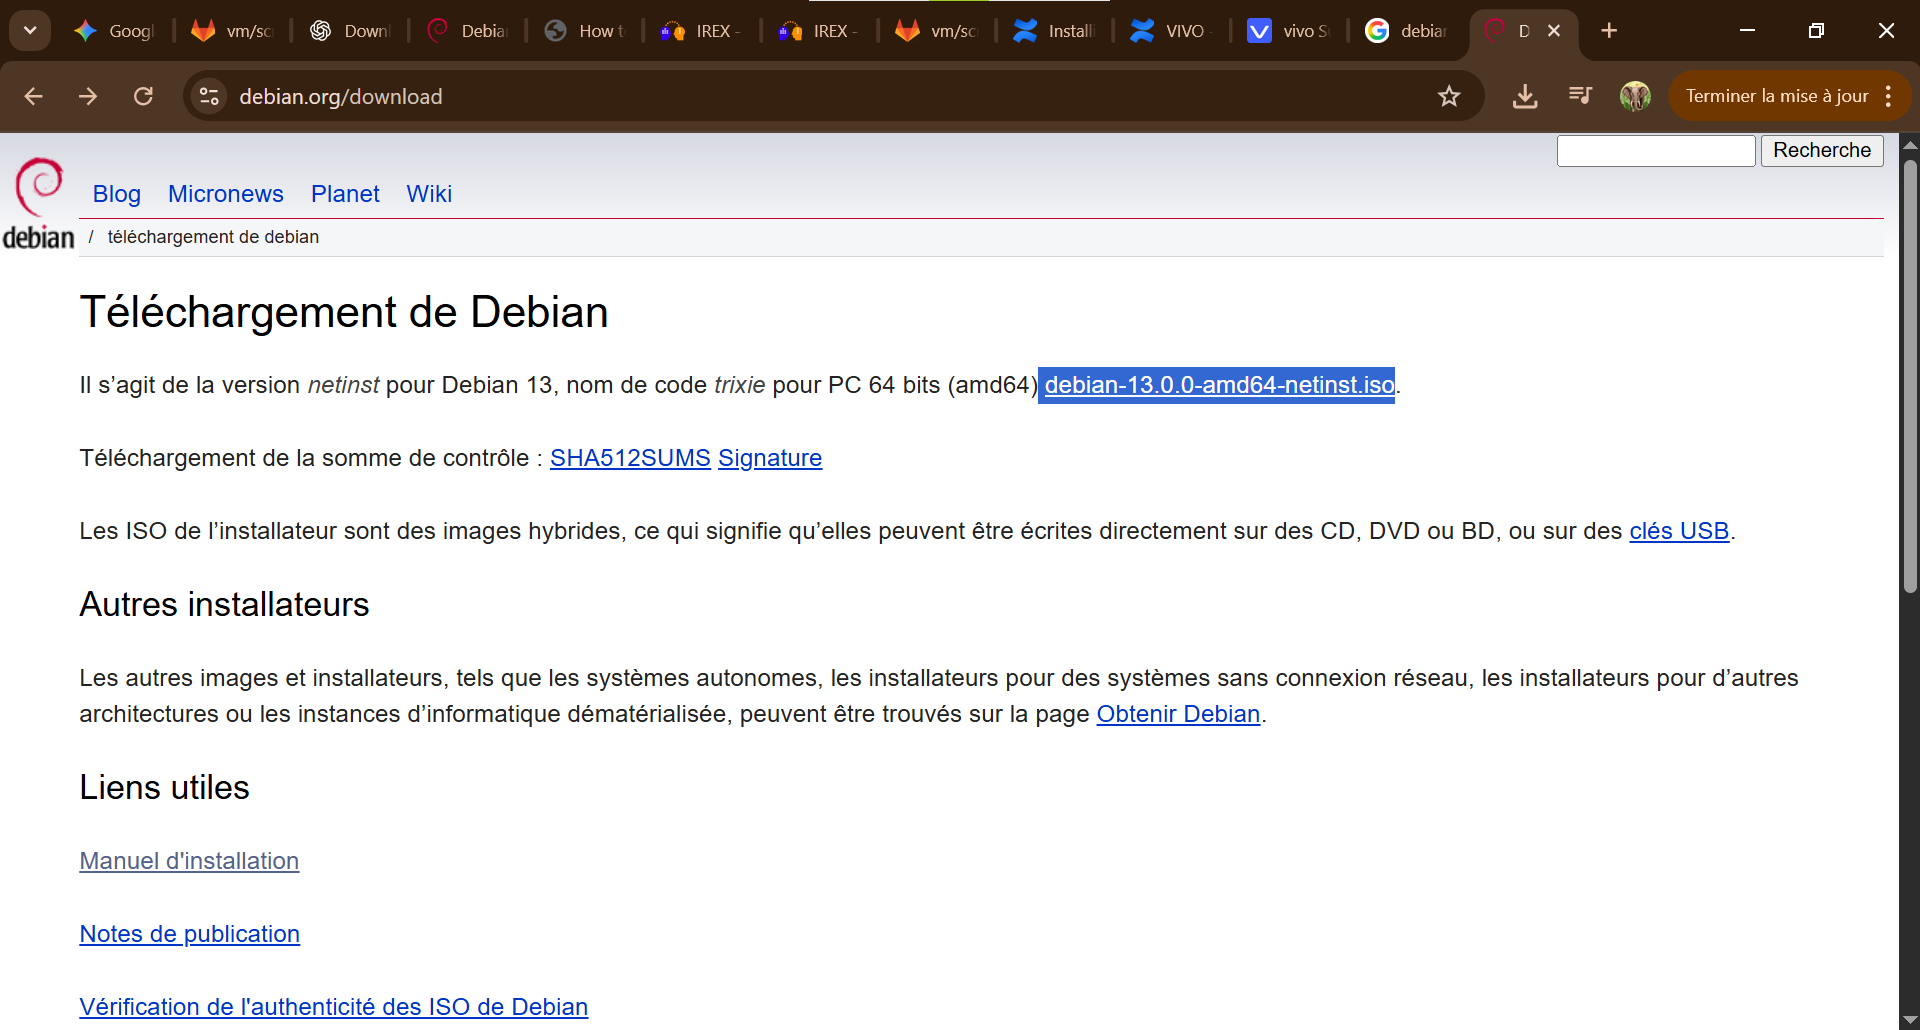
3. Downloading the Debian 13 ISO Image
To install Debian 13, you first need to download the official ISO image. Debian provides multiple installation images depending on your use case.
The safest way to get Debian is directly from the official website available on the link Debian.org
Choosing the Right ISO image
- For a minimal setup, use the netinst ISO.
- For a desktop installation without internet dependency, download the full DVD ISO.
- If you want to try Debian before installing, use the Live ISO.
Here in our own case we will use the netinst ISO since we just need a minimal setup.
After the download save the image to a safe location where it can easily be accessed.
4. Setting Up a Virtual Machine
Running Debian 13 inside a virtual machine allows you to test and use the system safely without affecting your host computer. You can use tools such as VirtualBox (free and open source), VMware Workstation, or GNOME Boxes.
In this guide, we’ll illustrate with VirtualBox(recommended), but the steps are similar for other hypervisors.
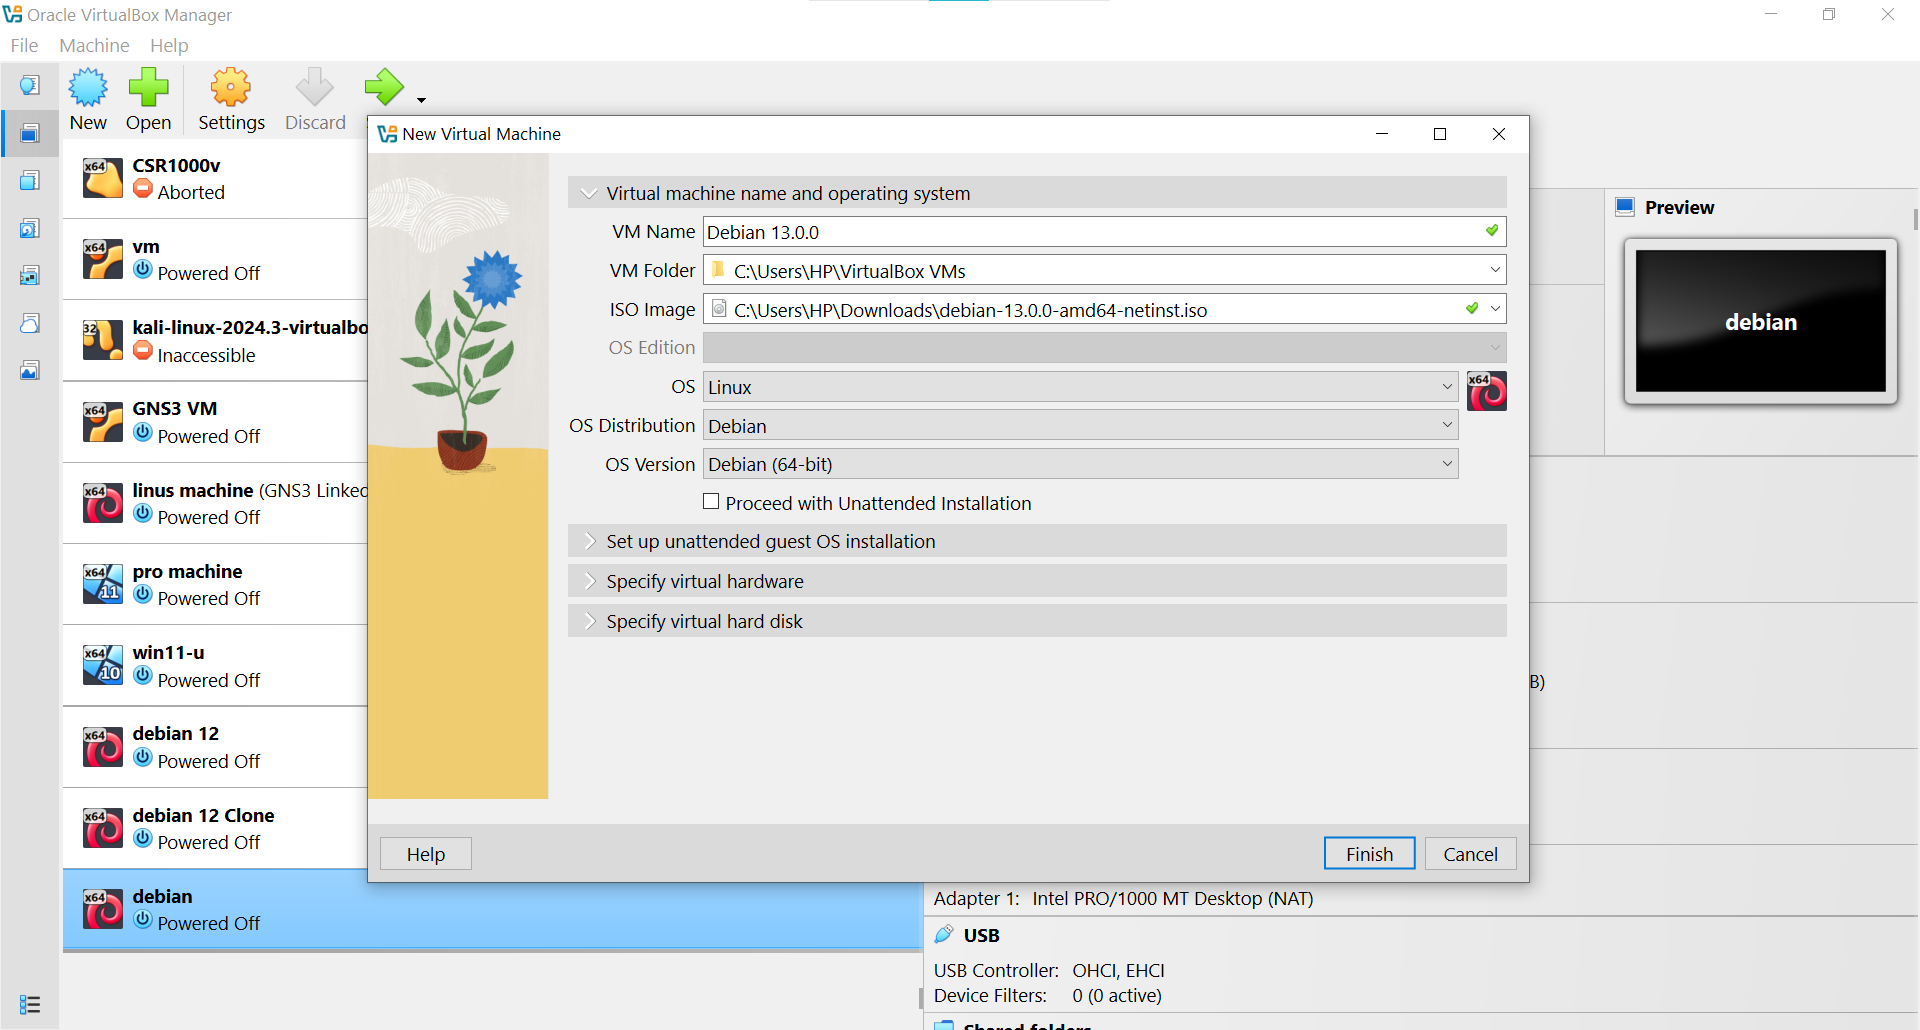
i. Create a New Virtual Machine
- Open VirtualBox.
- Click on New.
- Enter a name for the VM, e.g., Debian 13.0.0
- Insert the downloaded ISO Image.
- Skip the unattended guest installation and move to the next step.
ii. Specify Virtual hardware
- Allocate the size of the base memory you want your VM to have.
- Assign the number of CPUs(atleast 2 cpu)
- Enable the Use EFI, then move to the next step

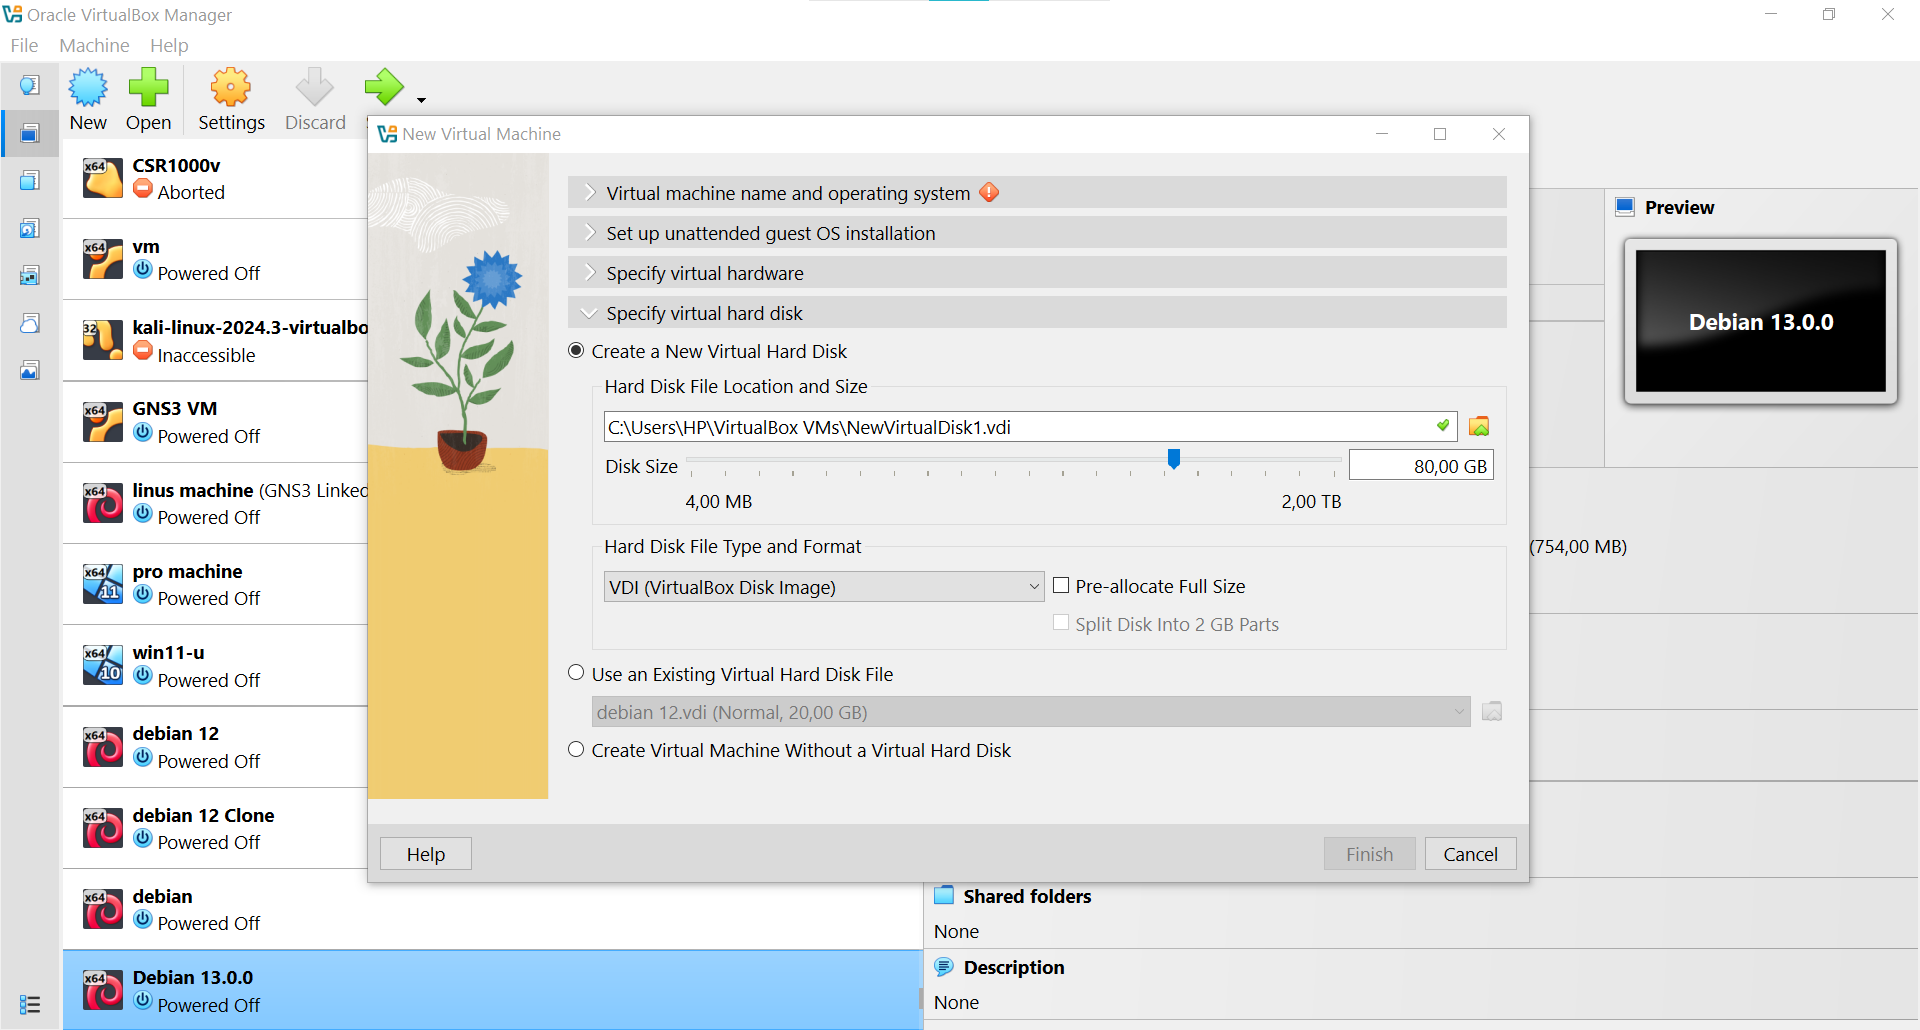
iii. Specify Virtual Hard disk
- Choose create a new virtual hard disk.
- Allocate the virtual hard disk size, and click on finish
iv. Start the VM
Once everything is set, click Start. Your VM will now boot from the Debian 13 ISO and begin the installation process.
5. Step-by-Step Installation Process
Once the VM is created and the Debian 13 ISO is attached, you can proceed with the installation. The Debian Installer is text-based but intuitive, guiding you through system setup step by step.
The following steps shows the step-by-step guide for the installation proces:
Step 1: Boot from ISO
- Start the virtual machine.
- From the boot menu, choose Graphical Install (recommended for beginners).
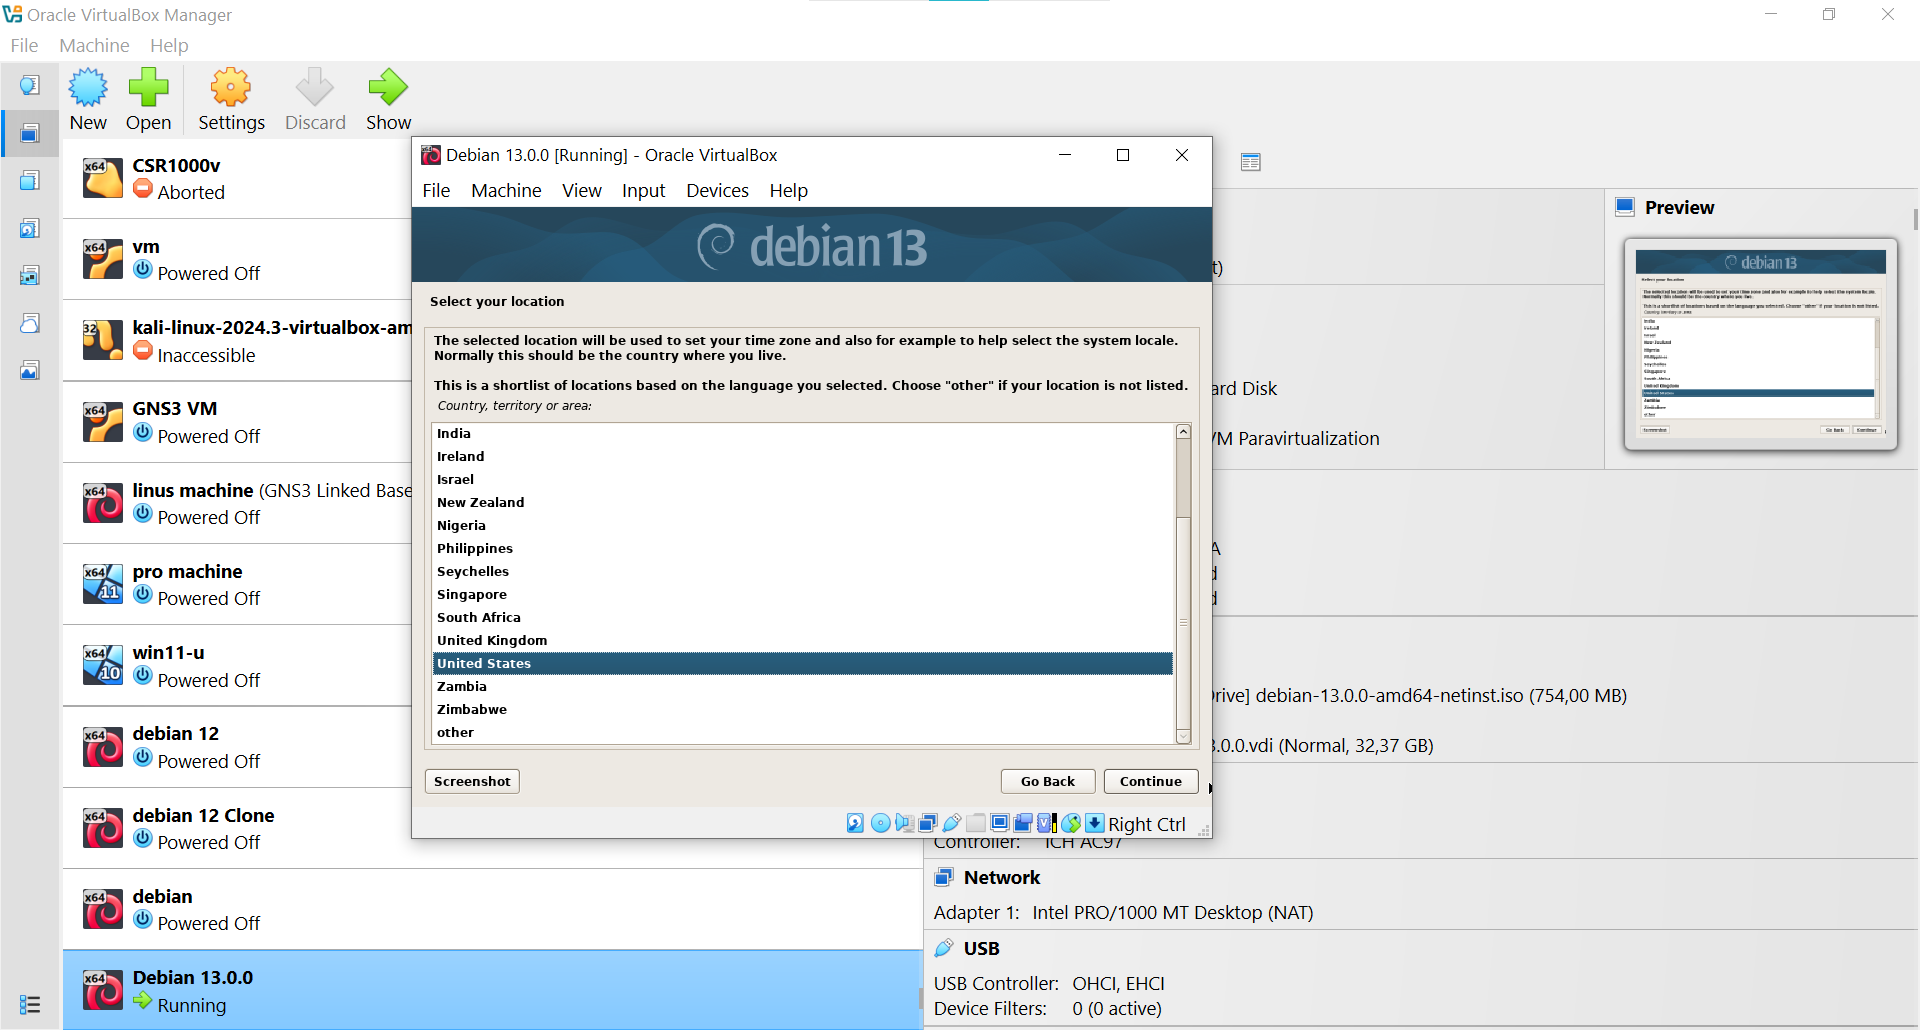
Step 2: Choose Language, Location, and Keyboard Layout
- Select a language.
- Select your location (NB: Choose United states to be sure there is an available mirror).
Step 3: Configure Network
- Configure the network by entering the hostname of the system (Hostname: debian).
- Optionally provide a domain name (or leave blank if unsure).
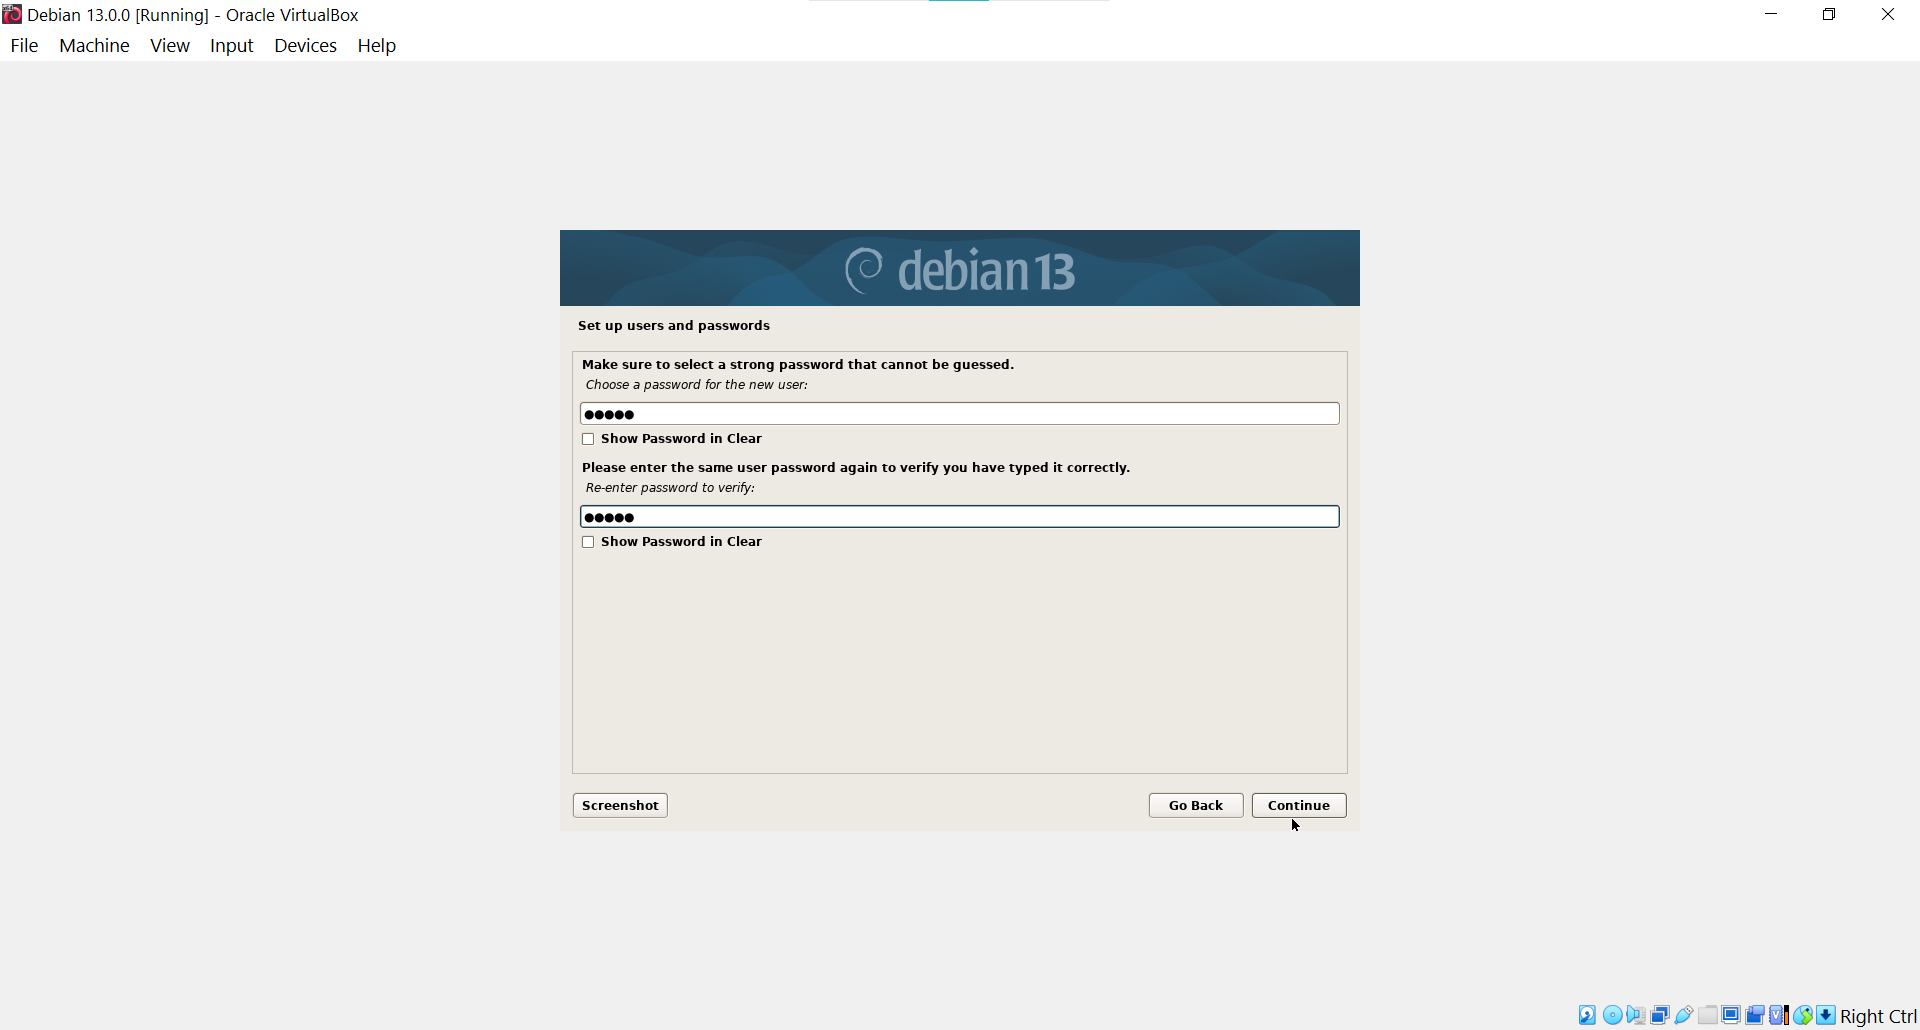
Step 4: Set Up Users and Passwords
- Create a root (administrator) password. If you want to be different from your normal user you can set the root password, but if not leave it empty and continue.
- Create a regular user account with a username and password.
Step 5: Partition Disks
You will be asked to configure the virtual hard disk:
- Select Guided – use entire disk (recommended for new users).
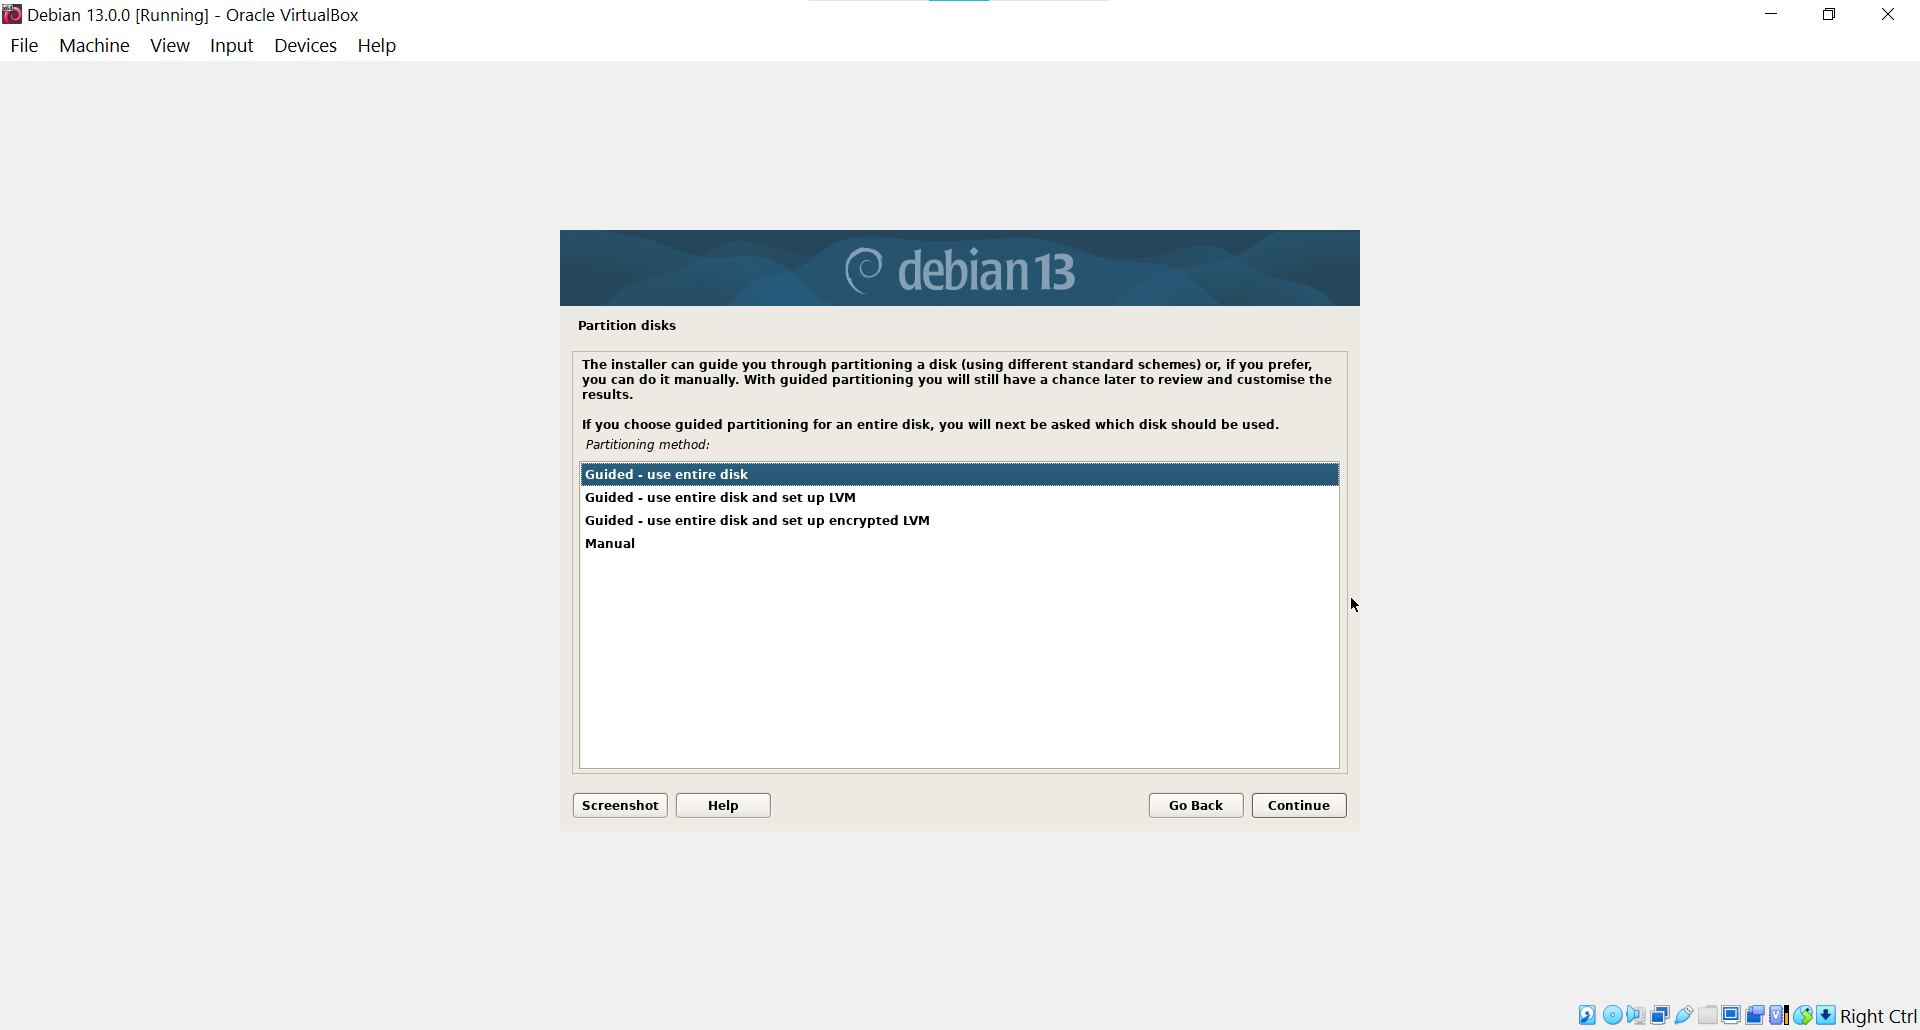
- Partition scheme: All files in one partition (simpler).
- Confirm and write changes to disk.
Step 6: Install the Base System
- The installer will now copy files and set up the base Debian 13 system.
- This may take several minutes depending on your VM resources.
Step 7: Configure Package Manager
- If asked about a network mirror, choose “Yes” and select a mirror near your region.
- This ensures you get the latest updates and additional software.
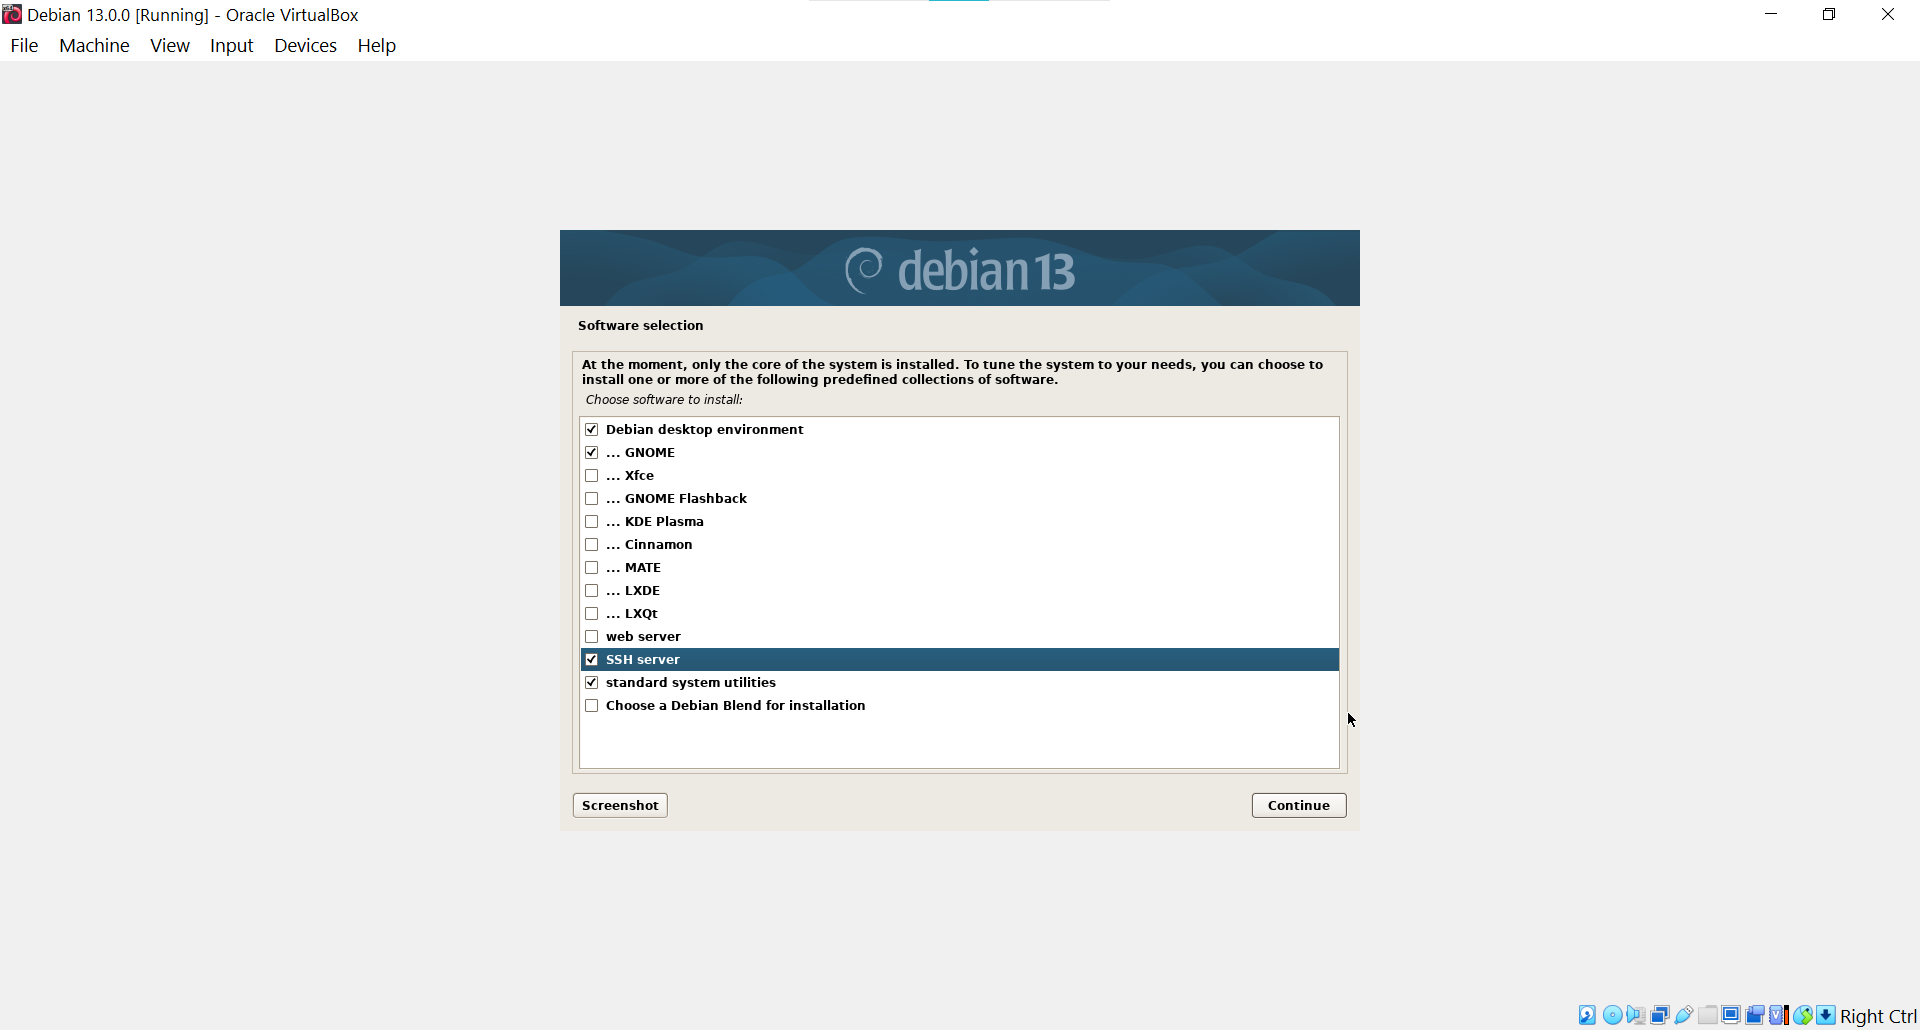
Step 8: Select and Install Software
You will be prompted to choose a software collections:
- Debian desktop environment → Choose between GNOME (default), KDE Plasma, XFCE, or others.
- Standard system utilities (recommended).
- For servers, you may deselect the desktop environment and install only what you need.
Step 9: Install GRUB Boot Loader
- Select Yes when asked to install GRUB.
- Choose your primary disk (/dev/sda).
- This allows Debian 13 to boot correctly.
Once installation is complete, the installer will eject the ISO and reboot the VM.
Log in with the user account you created.
🎉 Congratulations — Debian 13 is now installed on your virtual machine!
6. Post-Installation Process
After successfully installing Debian 13 on your virtual machine, there are several important steps to ensure your system is up-to-date, secure, and optimized for daily use.
- Update the system: Always start by updating your package lists and upgrading installed packages
sudo apt update
sudo apt upgrade -y
This ensures you have the latest security patches and software updates.
sudo apt install build-essential dkms linux-headers-$(uname -r) -y
Then insert the Guest Additions ISO from Devices → Insert Guest Additions CD Image…, mount it, and run the installer:
sudo sh /media/cdrom/VBoxLinuxAdditions.run
Reboot afterward:
sudo reboot
sudo apt install curl wget git vim unzip software-properties-common -y
At this stage, Debian 13 is fully functional inside your VM and ready for customization or development.
7. Cloning a Debian 13 Virtual Machine
Once your Debian 13 virtual machine is installed and configured, it’s a good idea to create a clone. Cloning allows you to duplicate your VM, keeping the original as a clean backup while you experiment with the copy.
a. Why do we clone a VM?
- Backup: Protect your setup from accidental changes or system breakage.
- Testing: Try new software or configurations without risking your main VM.
- Deployment: Create multiple identical Debian 13 VMs quickly.
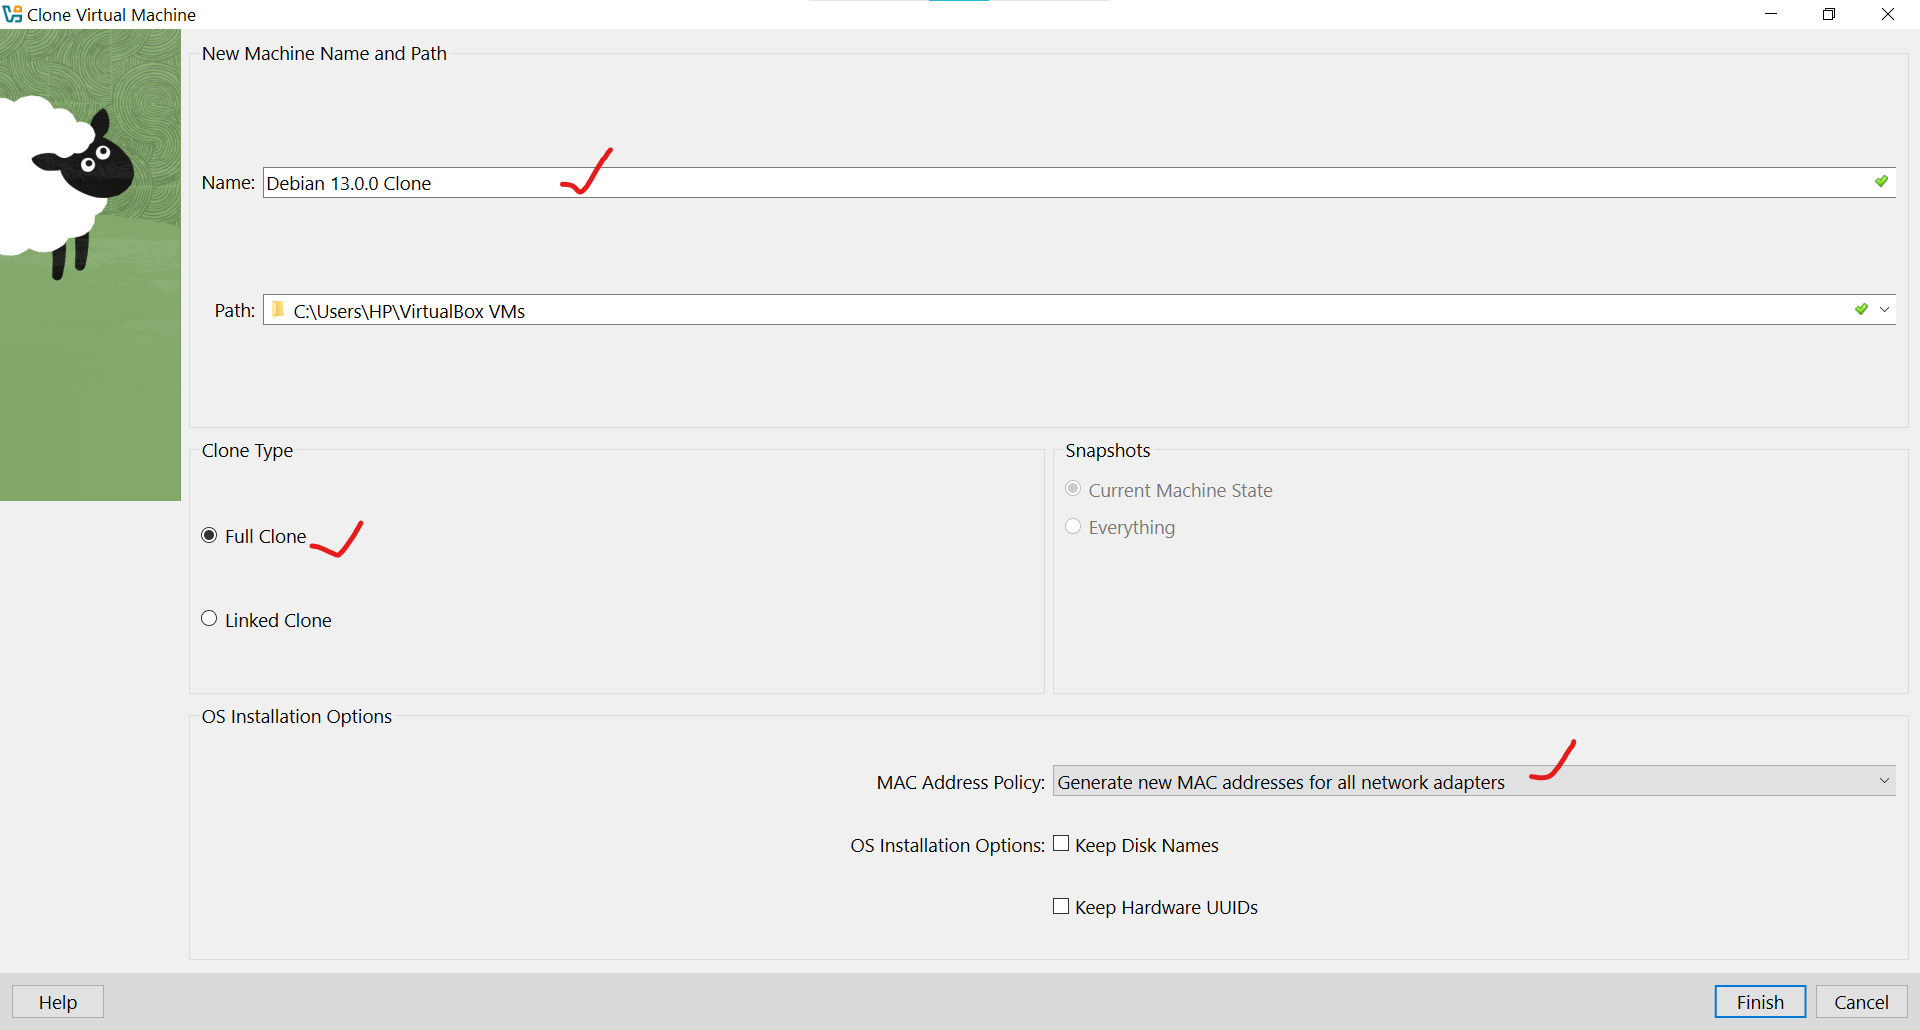
b. How to clone a VM in VirtualBox
- Open VirtualBox and shut down your Debian 13 VM.
- Right-click on the VM, select Clone.
- Enter a name for the cloned VM (e.g., Debian 13.0.0 Clone).
- Choose cloning type:
- Full Clone: Creates a completely independent VM (recommended).
- Linked Clone: Saves space by referencing the original VM (depends on the original, not recommended for long-term use).
- Select whether to Reinitialize the MAC address (recommended if you’ll run both VMs on the same network).
- Click finish and wait for the process to complete.
c. Tips for Using Clones
- Keep one VM as a golden image (a clean, updated install).
- Always take snapshots before major experiments.
- Use clones for different purposes: development, testing, or learning.
8. Best Practices for Running Debian 13 on a VM
Once Debian 13 is up and running in your virtual machine, it’s important to keep it secure, efficient, and reliable.
Following a few simple best practices will help you get the most out of your setup:
- Keep the system updated: run updates regularly or enable automatic upgrades.
- Use sudo safely: avoid daily root usage and stick to your user account.
- Enable a firewall: configure UFW to restrict unwanted network access.
- Optimize VM resources: allocate enough RAM/CPU and use snapshots wisely.
- Backup regularly: export or snapshot the VM to protect your data.
- Install only essentials: remove unused software to keep the system lean.
- Harden security: disable unnecessary services, use strong passwords, and enable encryption if needed.
- Enhance productivity: install guest additions, enable clipboard sharing, and tweak desktop settings.
9. Conclusion
Installing Debian 13 “Trixie” in a virtual machine is more than just a technical exercise, it’s a gateway to exploring one of the most stable and respected Linux distributions available today. Whether you’re a beginner eager to learn Linux in a safe environment, or a professional testing deployments before moving to production, a VM provides the perfect balance of flexibility and security.
By downloading the ISO, setting up the virtual machine, walking through the installation, applying essential post-installation steps, and following best practices, you now have a clean, powerful, and customizable Debian 13 environment at your fingertips.
The beauty of Debian lies not only in its stability but also in its community-driven development and vast software ecosystem. With your VM ready, you’re free to experiment, build projects, or simply enjoy a reliable Linux desktop, all without risking your host system.
No comments yet. Start a new discussion.